
If you’ve ever been curious about those buzzing tools nail salons use, you’re in the right place. Nail drill bits might sound like something out of a hardware store, but they’re actually essential for nail techs everywhere. These little tools help shape, smooth, and design your nails with precision. Whether you’re a pro or just starting, understanding nail drill bits can make your manicure game strong. Let’s dive into the basics and explore what makes these bits tick.
Key Takeaways
- Nail drill bits are crucial for shaping and detailing nails.
- Different types of bits suit various tasks, from smoothing to filing.
- Choosing the right grit level is important for the desired finish.
- Safety should always be a priority when using nail drill bits.
- Proper care extends the life of your nail drill bits.
Exploring The World Of Nail Drill Bits

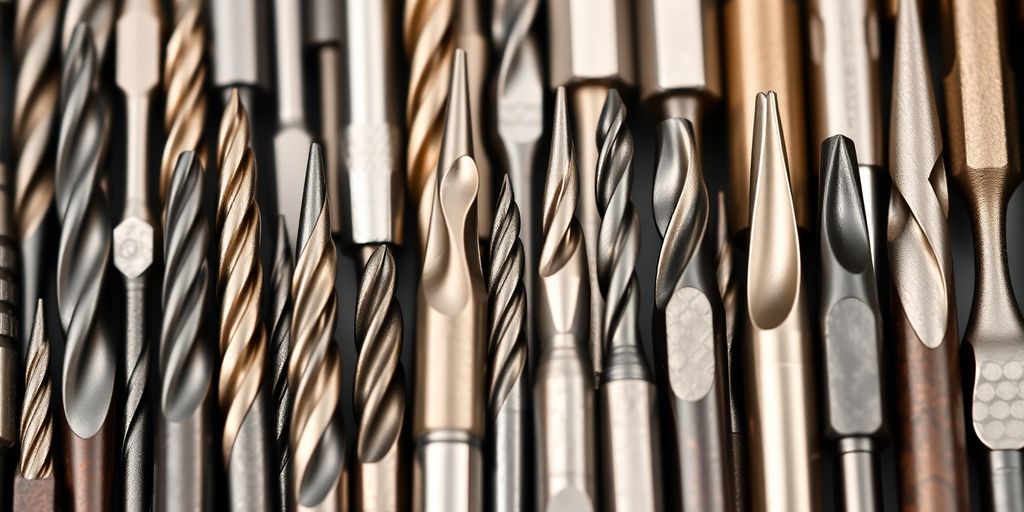
What Are Nail Drill Bits?
Nail drill bits are those tiny, magical tools that transform your nail game. They’re like the unsung heroes of manicures and pedicures. These bits come in different shapes and sizes, each designed for specific tasks. Whether you’re smoothing out a nail or removing acrylic, there’s a bit for that. Understanding the types of drill bits can make all the difference in achieving salon-quality results at home.
Why Nail Drill Bits Matter
You might be wondering, why even bother with these bits? Well, they make nail care efficient and precise. Imagine trying to manually file down gel polish—it’s a workout! Nail drill bits save you time and effort. Plus, they help in achieving that professional finish we all crave. They are essential for both acrylic and natural nails, ensuring you get the best results with minimal hassle.
How Nail Drill Bits Work
So, how do these little tools work? It’s pretty straightforward. You attach them to a nail drill, which spins the bit at high speeds. This rotation does the heavy lifting, whether you’re filing, buffing, or cleaning. The key is to choose the right bit for the job and to handle the drill with care. Remember, practice makes perfect, and soon you’ll be using these bits like a pro.
"Getting the hang of nail drill bits can seem tricky at first, but once you do, it’s a game changer for your nail routine."
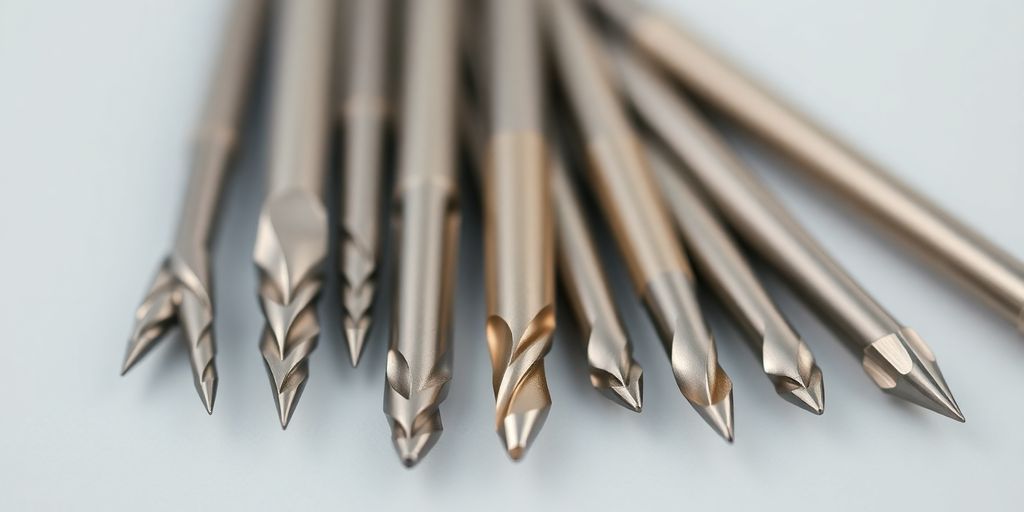
Types Of Nail Drill Bits
Carbide Drill Bits
Carbide drill bits are like the workhorses of the nail world. They’re tough, durable, and perfect for removing large amounts of acrylic or gel quickly. These bits come in various coarseness levels, from fine to extra coarse, allowing you to shape and refine nails with precision. If you’re looking to buy nail drill bits, explore a range of high-quality carbide options, which are designed for both professional and personal use.
Ceramic Drill Bits
Ceramic drill bits are known for their heat resistance. They generate less heat, which makes them ideal for clients with sensitive nails. These bits are excellent for removing gel polish and smoothing surfaces. They come in various grits and shapes, so you can find the right one for any task.
Diamond Drill Bits
Diamond drill bits are the go-to for fine detailing and cuticle work. Coated with natural or synthetic diamond particles, these bits are incredibly durable and effective for prepping the nail bed. They’re perfect for refining and finishing touches, giving your nails a polished look.
"Choosing the right type of nail drill bit can make all the difference in your nail care routine. Whether you’re filing down acrylics or smoothing out gel polish, there’s a bit for every task."
When you’re in the market to buy nail drill bits, consider what material and coarseness level will best suit your needs. Each type has its own strengths, so mix and match to find your perfect nail toolkit.
Choosing The Right Nail Drill Bits
Understanding Grit Levels
When picking out nail drill bits, understanding grit levels is super important. Grit levels tell you how coarse or fine a bit is. The lower the grit number, the coarser the bit. Coarse bits are great for removing bulk material like acrylics, while finer grits are perfect for smoothing and finishing touches. Here’s a quick rundown:
- Coarse (80-100 grit): Best for heavy material removal.
- Medium (150-180 grit): Ideal for shaping and refining.
- Fine (240 grit and above): Perfect for smoothing and polishing.
Matching Bits To Tasks
Choosing the right bit for the job can make all the difference. Here’s a simple guide:
- Removing Gel Polish: Use a medium to coarse grit bit.
- Shaping Acrylic Nails: Opt for a coarse grit bit.
- Cuticle Work: A fine grit bit is your best friend.
- Smoothing and Finishing: Go for a fine or extra fine grit bit.
Considering Material Types
Nail drill bits come in different materials, each with its own perks:
- Carbide Bits: Known for durability and efficiency, they’re perfect for removing bulk material like acrylics.
- Ceramic Bits: These generate less heat, making them ideal for sensitive nails.
- Diamond Bits: Great for detailed work and prepping the nail bed.
Picking the right nail drill bit isn’t just about the task at hand; it’s also about knowing your tools and what they can do for you. Whether you’re a pro or a beginner, the right bit can make your nail game strong.
Using Nail Drill Bits Safely
Essential Safety Tips
When you’re diving into the world of nail drills, safety should be your number one priority. Always start by wearing protective eyewear to shield your eyes from flying debris. It’s also wise to use a dust mask, as nail dust can be quite irritating when inhaled. Make sure your workspace is well-lit and clutter-free to avoid accidents.
Common Mistakes To Avoid
Even seasoned nail enthusiasts make mistakes. One common error is applying too much pressure, which can damage both the nail and the drill bit. Another mistake is using the wrong bit for the task at hand. For instance, coarse bits should never be used on natural nails; they can cause severe damage. Lastly, skipping regular maintenance on your drill can lead to overheating and reduced performance.
How To Handle Your Drill
Handling your nail drill with care extends its life and ensures your safety. Start with a low speed setting and gradually increase as you become more comfortable. Hold the drill like a pencil for better control, and always move it in one direction to avoid creating friction that could burn the nail. Regularly check your drill for any signs of wear and tear, and replace worn-out bits promptly to maintain efficiency.
Caring For Your Nail Drill Bits
Cleaning Techniques
Keeping your nail drill bits clean is crucial for both performance and hygiene. After each use, make sure to remove any dust and debris with a small brush. Then, soak the bits in rubbing alcohol or an antibacterial solution for a few minutes to kill any lingering bacteria. Let them air dry completely before storing them away. This helps prevent rust and keeps them in top shape for the next use.
Proper Storage Solutions
Storing your nail drill bits properly can extend their life significantly. Always keep them in a protective case or organizer when not in use. This not only prevents them from getting lost but also protects them from dust and moisture. Store the case in a cool, dry place to avoid any damage from humidity. Proper storage ensures that your bits remain sharp and ready for action.
When To Replace Bits
Regular inspection of your nail drill bits is essential. Over time, they will wear out, which can impact their effectiveness and potentially damage your nails. Coarse bits typically need replacing after 5-7 uses, while finer bits can last up to 15 uses. Always check for signs of wear, such as dullness or cracks, and replace them as needed.
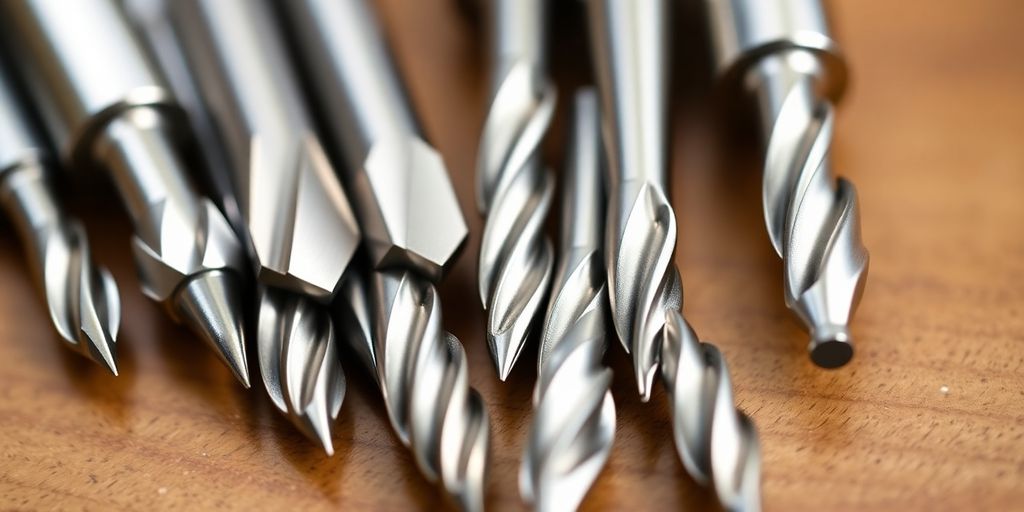
Nail Drill Bits For Beginners
Getting Started With Nail Drills
So, you’re thinking about jumping into the world of nail drills? Awesome choice! These tools can really up your nail game, giving you those salon-quality results right at home. But before you start, it’s crucial to understand your equipment. First off, invest in a quality nail drill. This can make all the difference in your experience. Make sure you charge it fully if it’s cordless, so you don’t get stuck halfway through your mani.
Best Bits For New Users
When you’re just starting out, selecting the right nail drill bits can feel like a daunting task. Here’s a simple breakdown to help:
- Carbide Bits: Great for removing bulk material like acrylics. They’re durable and efficient. Lena Bits offers high-quality options that are perfect for both newbies and pros.
- Ceramic Bits: These are known for staying cool, which is great if you’re worried about heat. They’re smooth and gentle, ideal for sensitive nails.
- Diamond Bits: Perfect for precision work, like cuticle cleaning. They’re a staple in any nail kit.
Practicing Techniques
Before diving into your own nails, it might be a good idea to practice on some fake nails. This can help you get the feel of the drill without the fear of messing up. Here are some tips:
- Start Slow: Use the lowest speed setting initially. This helps you get used to the drill’s vibration and sound.
- Focus on Control: Practice maintaining a steady hand and light pressure. Let the drill do the work.
- Seek Guidance: If possible, get some tips from experienced nail techs or watch online tutorials. They can be super helpful.
Nail drills are amazing tools, but they require patience and practice. Don’t rush the learning process. Take your time to get comfortable, and soon you’ll be crafting stunning nails with ease!
Advanced Techniques With Nail Drill Bits
Refining Your Skills
So, you’ve got the basics down, and now you’re ready to step up your game. Refining your skills with nail drill bits involves understanding the nuances of each type of bit and how they interact with different nail surfaces. It’s all about practice and patience. Start by experimenting with different speeds and pressures to see how they affect the finish on the nail. Remember, the goal is to achieve a smooth, even surface without causing any damage.
Creating Nail Art Designs
Nail art is where creativity meets precision. Using specialty drill bits, like those designed for carving or detailing, can help you create intricate designs that stand out. Here are a few tips to get started:
- Choose the right bit for the design you’re aiming for, such as a fine diamond bit for delicate lines.
- Practice on a nail tip or a practice hand before working on your own nails or a client’s.
- Keep your hand steady and use a light touch to avoid over-carving.
Speed Control Tips
Mastering speed control is crucial for both safety and achieving the best results. Different tasks require different speeds; for example, removing bulk material might need a higher speed, while detailing requires a slower, more controlled pace. Here’s a simple guide:
- Low Speed (5,000-10,000 RPM): Ideal for cuticle work and gentle buffing.
- Medium Speed (10,000-15,000 RPM): Suitable for shaping and smoothing.
- High Speed (15,000-20,000+ RPM): Best for removing gel or acrylic overlays quickly.
Tip: Always start at a lower speed when you’re trying a new technique or bit. You can gradually increase the speed as you become more comfortable and confident.
For those looking to explore high-quality nail drill bits, consider options that offer minimal heat development and high abrasion rates. These features are particularly beneficial when working on gel, acrylic, or natural nails, enhancing both care and artistry.
Troubleshooting Nail Drill Bit Issues
Navigating the world of nail drill bits can be tricky, especially when things don’t go as planned. Here’s a guide to help you troubleshoot common issues so you can keep your manicure game strong.
Identifying Common Problems
When your nail drill bits aren’t performing as expected, the first step is identifying the problem. Common issues include:
- Bit Dullness: If your bits aren’t cutting as cleanly, they might be dull. This often happens after prolonged use.
- Vibration: Excessive vibration can indicate a misalignment or a worn-out bit.
- Overheating: If your bit gets too hot, it could be due to high speed or pressure.
Fixing Bit Misalignment
Misalignment can cause your drill to wobble or vibrate excessively. Here’s how to fix it:
- Check the Chuck: Make sure the bit is seated properly in the chuck. A loose bit can cause misalignment.
- Inspect the Bit: Look for any bends or warps. Replace any damaged bits.
- Tighten Securely: Ensure the bit is tightened securely to prevent movement during operation.
Dealing With Overheating
Overheating can damage both the drill bit and your nails. To manage this:
- Adjust Speed: Lower the speed of the drill. High speeds generate more heat.
- Reduce Pressure: Apply less pressure to avoid friction.
- Take Breaks: Allow the bit to cool down between uses.
"Remember, the key to a smooth operation is regular maintenance and careful handling."
For high-quality diamond drill bits that minimize these issues, consider options from Lena Bits Corporation. Their products are designed to handle gel, acrylic, and natural nails with ease, ensuring a professional finish every time.
Where To Buy Quality Nail Drill Bits
Top Online Retailers
Finding the right nail drill bits online is a breeze if you know where to look. Online shopping offers convenience and a wide selection that local stores might not have. Here are some top spots to check out:
- Amazon: A go-to for almost everything, Amazon offers a vast selection of nail drill bits, including carbide, ceramic, and diamond options. You can easily compare prices and read reviews from other buyers.
- Nails Pro Academy Store: Explore their Bits from Russia collection, which includes a variety of drill bits. They also provide useful resources on how to use these tools effectively.
- Lena Bits Corporation: Known for their high-quality diamond nail file drill tools, Lena Bits offers products that provide fine cross-cut treatment for nails. Their site also offers tips on nail drill bit safety and maintenance.
Local Supply Stores
While online shopping is convenient, sometimes you might want to see and feel the product before buying. Local beauty supply stores can be a great place to find quality nail drill bits. These stores often have knowledgeable staff who can offer advice and recommendations.
What To Look For When Buying
When shopping for nail drill bits, whether online or in-store, consider these factors:
- Material: Decide between carbide, ceramic, or diamond bits based on your needs. Carbide bits are durable, ceramic bits are heat resistant, and diamond bits are great for detailed work.
- Grit Level: Choose the right grit level for the task. Finer grits are for smoothing, while coarser grits are for removing bulk material.
- Compatibility: Ensure the bits are compatible with your nail drill machine.
Buying quality nail drill bits is an investment in your nail care routine. Whether you’re a professional or just starting, having the right tools can make all the difference.
If you’re looking for top-notch nail drill bits, you’ve come to the right place! Our selection includes everything from diamond bits to specialized tools for acrylic and gel nails. Don’t miss out on the chance to elevate your nail care game. Visit our website now to explore our amazing range of nail drill bits!
Wrapping Up Our Nail Drill Bits Journey
So there you have it, folks! Nail drill bits might seem like tiny tools, but they pack a punch when it comes to getting that perfect manicure or pedicure. Whether you’re a pro or just starting out, knowing your bits can make all the difference. From carbide to ceramic, each type has its own special job, helping you tackle everything from shaping to smoothing. And remember, practice makes perfect. So, grab your drill, pick the right bit, and get ready to nail it—literally! Happy drilling!
Frequently Asked Questions
What exactly are nail drill bits?
Nail drill bits are tiny tools used with electric nail drills to shape, file, and polish nails. They come in various shapes and materials, each designed for specific tasks in nail care.
Why are nail drill bits important?
Nail drill bits are essential for achieving professional-looking nails. They allow for precision and efficiency in tasks like removing gel polish, shaping nails, and cleaning cuticles.
How do you choose the right nail drill bit?
To choose the right nail drill bit, consider the task you need to perform, the material of the bit, and the grit level. Different bits are suited for different jobs, like smoothing, shaping, or removing bulk material.
What are the different types of nail drill bits?
There are several types of nail drill bits, including carbide, ceramic, and diamond bits. Each type has its own strengths, like durability or heat resistance, making them suitable for different tasks.
How often should you replace nail drill bits?
Nail drill bits should be replaced based on their wear and tear. Coarse bits might need replacing after 5-7 uses, while finer bits can last 10-15 uses. Always check for signs of damage or dullness.
Can beginners use nail drill bits?
Yes, beginners can use nail drill bits, but it’s important to start with the basics and practice on fake nails first. Using the drill at a low speed and learning proper techniques can help avoid mistakes.
How do you clean nail drill bits?
Clean nail drill bits by wiping away dust and debris, then soaking them in rubbing alcohol or an antibacterial solution. Allow them to air dry before storing to prevent bacteria buildup.
Where can you buy quality nail drill bits?
Quality nail drill bits can be purchased from online retailers, local beauty supply stores, or specialized nail care shops. Look for reputable brands and read reviews to ensure you’re getting a good product.