Picking out the perfect nail drill bit can be a bit overwhelming, especially with all the choices out there. Whether you’re a pro or just love doing your nails at home, understanding what each bit does can save you time and effort. From the material to the shape, and even the grit, each bit has its own job. Let’s break down how to find the right nail drill bit for your needs.
Key Takeaways
- Nail drill bits come in various materials like tungsten carbide, ceramic, and diamond, each serving different purposes.
- The shape of the drill bit affects its function, with options like barrel, cone, and ball top shapes for different tasks.
- Grit levels vary from fine to coarse, impacting how much material is removed and the smoothness of the finish.
- Cut designs on bits, such as straight or cross-cut, influence the efficiency and precision of nail work.
- Proper maintenance and cleaning of nail drill bits extend their life and ensure safe, effective use.
Understanding Nail Drill Bits and Their Uses

What Are Nail Drill Bits?
Nail drill bits are nifty little tools that work with electric nail drills to help you with various nail tasks. Whether you’re shaping, smoothing, or removing nail polish, these bits are essential. They’re made from materials like tungsten carbide, diamond, and ceramic, each offering its own level of durability and effectiveness. The different shapes and grooves of nail drill bits cater to specific functions, from tackling large surfaces to detailed cuticle work.
Common Types of Nail Drill Bits
Here’s a quick rundown of some common types of nail drill bits you might consider when you buy nail drill bits:
- Sand Band Drill Bit: Often used with disposable sanding bands, this bit is great for general nail work and removing gel polish.
- Cuticle Drill Bit: Made from tungsten carbide, it’s designed to clean up non-living tissue around the nails safely.
- Smooth Drill Bit: Typically made of diamond, this bit smooths out the nail surface and can also handle calluses and gel polish.
How Nail Drill Bits Work
Nail drill bits are designed to rotate at high speeds, allowing them to perform tasks like shaping and smoothing nails quickly and efficiently. The key is to choose the right bit for the job. For example, if you’re working on acrylic nails, a long flame nail drill bit might be ideal as it covers a large area quickly. On the other hand, if precision is what you need, a cone bit could be your best friend.
Understanding the different types of nail drill bits and their specific uses can really elevate your nail care game. It’s all about finding the right tool for the task at hand, ensuring you get the best results every time you sit down for a manicure or pedicure.
Choosing Nail Drill Bits by Material
Tungsten Carbide Benefits
Tungsten carbide drill bits are like the superheroes of nail care tools. They are incredibly tough and durable, making them a perfect choice for heavy-duty nail work. These bits are perfect for removing hard gels and acrylics with ease. Their precision cutting ability helps in achieving a smooth finish without damaging the nails. If you want something that lasts long and can handle a variety of tasks, tungsten carbide is your go-to.
Ceramic Drill Bits Explained
Ceramic drill bits are all about comfort and ease. They don’t heat up as quickly as other materials, which is a big plus if you’re working on nails for a longer time. These bits are also rust-resistant, meaning they stay in good shape longer. For those who are sensitive to metal, ceramic is a great alternative. They come in various grits, so you can find the perfect one for your needs.
Diamond Drill Bits Overview
Diamond drill bits are like the luxury cars of the nail drill world. Made with natural diamonds, these bits are incredibly durable and perfect for detailed work. They excel in dry manicures and are great for cuticle work. However, be cautious; some brands might label their bits as "diamond" when they are actually made from less durable materials. Always check for authenticity to ensure you’re getting the real deal.
When choosing nail drill bits, consider what material suits your needs best. Whether it’s the strength of tungsten carbide, the comfort of ceramic, or the precision of diamond, each material offers unique benefits that can enhance your nail care routine.
Selecting Nail Drill Bits by Type
Choosing the right nail drill bits can feel overwhelming, but breaking it down by type makes it easier. Let’s explore the different types you can choose from.
Individual Nail Drill Bits
If you’re someone who prefers to have control over every detail, individual nail drill bits might be your best friend. These bits offer the flexibility to mix and match different materials, sizes, and shapes to suit your specific needs. Whether you’re dealing with natural nails, acrylics, or gel, having a selection of individual bits allows you to tailor your approach. Plus, they’re great if you don’t need a full set and just want a few specific tools in your kit.
Nail Drill Bits Sets
For those just starting out or looking for convenience, a nail drill bits set is a fantastic choice. These sets typically include a variety of bits that cover most nail care needs, whether you’re working at home or in a salon. Beginners especially might find these sets helpful because they come with everything you need without the hassle of selecting each bit individually. Sometimes, buying a set can even be more cost-effective than picking bits one by one.
Specialty Nail Drill Bits
When you have specific needs, specialty nail drill bits come into play. These are designed for unique tasks like intricate nail art or working on tough materials. If you’re someone who loves experimenting with nail designs or frequently works with challenging materials, having a few specialty bits can really expand your capabilities. They might include bits for under-nail cleaning or creating specific shapes and textures.
The right nail drill bit can make a world of difference in your nail care routine. Whether you opt for individual bits, a comprehensive set, or specialty tools, understanding what each type offers helps you make informed choices. Remember, the goal is to enhance your nail care experience and make it as efficient and enjoyable as possible.
For more information on a variety of high-quality nail drill bits designed for different needs, check out this collection where you can find everything from diamond nail files to carbide bits.
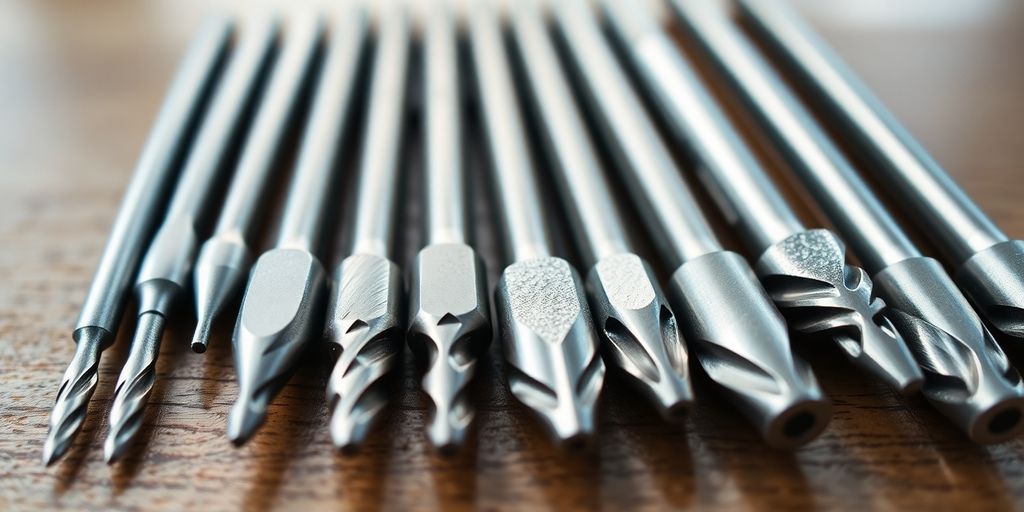
Identifying Nail Drill Bits by Shape

When you’re diving into the world of nail drill bits, understanding their shapes is like discovering a new language. Each shape has its own unique purpose, and knowing what they do can make your nail care routine a whole lot easier.
Barrel and Cylinder Bits
Barrel bits, also known as cylinder bits, are your go-to for surface work on nails. They’re great for removing product and shaping nails. Think of them as the workhorse of nail bits. They’re perfect for flattening the surface or even for backfill cutting. Just be careful around the cuticle area; these bits can be quite sharp.
Cone Bits for Precision
Cone bits are all about precision. Their tapered shape makes them ideal for reaching those tricky spots, like the sides of your nails or under the nail edge. LenaBits Carbide Nail Drill Bits CH45 are a great example of cone bits that offer precision filing for both natural and artificial nails. You can use them to remove acrylics or gel nails, thanks to their ability to complement the nail’s natural curve.
Ball Top Shape Bits
Ball top bits might look a bit unusual, but they have a specific role. They’re perfect for cleaning up hard skin or removing loose cuticles without the risk of injury. The rounded shape makes them safe to use, especially on sensitive areas. While they might not be as versatile as other bits, they do a fantastic job at what they’re designed for.
Understanding the shape of your nail drill bit can transform your nail care routine. It’s not just about picking a tool; it’s about choosing the right tool for the job. With the right shape, you can achieve a professional finish every time.
Incorporating these different shapes into your nail care arsenal allows you to tackle a wide range of tasks with ease. Whether you’re a pro or just starting out, knowing your bits will help you achieve the results you desire.
Understanding Grit Levels in Nail Drill Bits
When it comes to nail drill bits, understanding grit levels is key to achieving the perfect manicure or pedicure. The grit level of a nail drill bit determines how much material it can remove from the nail surface and how smooth the finish will be.
Fine, Medium, and Coarse Grits
Nail drill bits come in three basic grit levels: fine, medium, and coarse. Each level serves a different purpose:
- Fine Grit: Ideal for finishing touches, smoothing the nail surface, and prepping for polish. It’s gentle and less likely to cause damage.
- Medium Grit: This is your go-to for everyday tasks like shaping and shortening nails. It strikes a balance between removing material and maintaining control.
- Coarse Grit: Best for removing bulk material quickly, such as acrylic or gel. It’s more aggressive, so caution is needed to avoid damaging the nail or cuticle.
Choosing the Right Grit for Your Needs
Selecting the right grit level depends on your specific needs and experience level:
- Beginners: Start with fine grit to get comfortable with the drill and avoid over-filing.
- Intermediate Users: A medium grit bit offers more versatility for various tasks.
- Advanced Users: Coarse grit is perfect for those who have mastered control and need to remove material quickly.
How Grit Affects Performance
The grit level directly impacts how a nail drill performs. Finer grits provide a smoother finish but take longer to remove material. Coarser grits work faster but require a steady hand to avoid mishaps.
Grit level is like the Goldilocks of nail care—you need to find the one that’s just right for your task. Too coarse, and you risk damaging the nail; too fine, and you’ll spend ages trying to achieve the desired result.
By understanding these grit levels, you can select the perfect nail drill bit for your style and needs, ensuring both efficiency and safety in your nail care routine. For example, LenaBits Diamond Nail Drill Bits CH35 with their fine grit and barrel shape are excellent for precise filing, while LenaBits Carbide Nail Drill Bits CH50 offer a medium grit option for more detailed work.
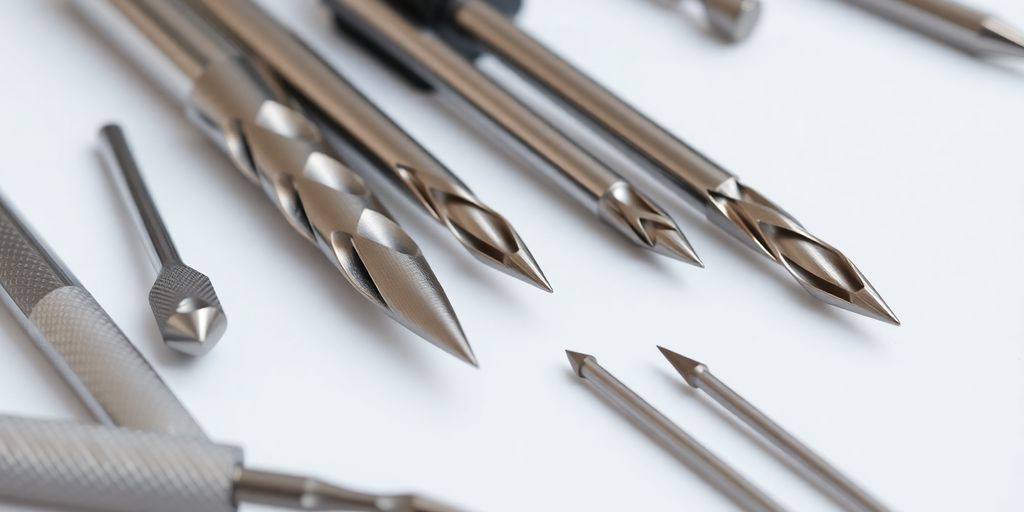
Exploring Cut Designs of Nail Drill Bits
Understanding the cut design of nail drill bits can really change how you work with nails. It’s not just about the shape or material; the cut design affects how the bit interacts with the nail surface, how it removes material, and even how it feels in your hand.
Straight Cut vs. Cross Cut
Straight cut bits have sharp, straight lines that make them great for quickly removing nail material. They’re often used by pros who need to get through tough gel or acrylic fast. On the other hand, cross cut bits have a crisscross pattern. This design spreads the pressure more evenly, making them a bit gentler on the nails. Beginners might find cross cut bits easier to handle since they offer more control and less risk of over-filing.
Unique Cut Designs for Specific Tasks
Some bits have unique cuts tailored for specific tasks. For example, the 5-in-1 bits offer different levels of coarseness depending on how you hold them. These are super handy if you’re switching between tasks without wanting to change bits constantly. Then there are safety bits, which are designed with rounded edges to prevent cuts and are perfect for delicate work around the cuticle area.
How Cut Design Impacts Efficiency
The cut design isn’t just about aesthetics; it directly affects how efficiently you can work. A well-chosen cut design can speed up your work and reduce fatigue. For instance, a straight cut might be quicker for bulk removal, but a cross cut could be better for finishing touches. When selecting a bit, think about the task at hand and what cut design will help you achieve the best results.
Choosing the right cut design is like picking the right tool for a job; it makes everything smoother and more efficient. Take time to explore different designs and see which ones fit your style best.
If you’re curious about trying these out, consider exploring a range of high-quality nail drill bits that are perfect for various nail treatments. They offer precision and efficiency, whether you’re working on acrylic, gel, or natural nails.
Rotation Direction and Its Importance
Forward vs. Reverse Rotation
When you’re working with nail drill bits, understanding rotation direction is a game-changer. Forward rotation is typically used by right-handed folks. It spins the bit clockwise, making it easier to control when you’re smoothing or shaping. On the flip side, reverse rotation is a lefty’s best friend, spinning counterclockwise to give that same level of control. Some bits, like those with an isosceles triangle cut, work equally well in both directions, which is perfect for ambidextrous use.
How Rotation Affects Performance
The direction your drill bit spins can really impact how it performs. For instance, using the correct rotation can help avoid unnecessary pressure on the nail, reducing the risk of damage. Plus, when you’re dealing with tougher materials like acrylic, using the right rotation helps in achieving a smoother finish. It’s like having the right tool for the job – makes everything easier and more efficient.
Choosing the Right Rotation for Your Needs
Picking the right rotation isn’t just about whether you’re a lefty or a righty. It’s also about the task at hand. If you’re working on a delicate nail design, you might prefer a specific rotation to maintain precision. Here’s a quick guide:
- Right-handed users: Stick with forward rotation for most tasks.
- Left-handed users: Reverse rotation will be your go-to.
- Ambidextrous bits: Great for versatility, no need to switch directions.
Using the right rotation direction can make your nail care routine smoother and more enjoyable. It’s all about finding what works best for your style and needs.
For more on carbide nail drill bits and how they cater to different nail care needs, check out our detailed guides.
Tips for Using Nail Drill Bits Effectively
Starting Slow for Safety
Getting the hang of using nail drill bits? It’s best to start slow. Begin with a low speed to get a feel for how the drill works. This helps in avoiding any damage to the natural nails. As you gain confidence, you can gradually increase the speed. Remember, patience is key!
Proper Technique for Different Tasks
Each task might require a different technique. For example, when you’re removing gel polish, you might want to use a carbide nail drill bit which is perfect for grinding and smoothing nail surfaces. Always match the bit to the job, and ensure you’re using the right angle and pressure to get the best results.
Maintaining Control During Use
Keeping control while using a nail drill is crucial. Hold the drill like a pen, ensuring a firm grip, but avoid pressing too hard on the nail surface. This prevents unnecessary friction and heat, which can damage the nail. If you’re just starting out, practice on a fake nail to build your confidence.
Practicing with patience and precision not only enhances your skills but also ensures the safety and satisfaction of your clients.
Incorporating these tips into your routine will not only make your nail care process smoother but also more enjoyable. Whether you’re a beginner or a seasoned pro, these pointers can help you achieve fantastic results every time.
Cleaning and Maintaining Your Nail Drill Bits
Keeping your nail drill bits in top condition is crucial for both performance and hygiene. Here’s how you can ensure your bits last long and stay clean.
Regular Cleaning Practices
Cleaning your nail drill bits should be a routine task. After every use, make sure to brush off any dust or debris with a soft brush. This not only keeps them sharp but also prevents any cross-contamination. You can use a bit of soapy water and a brush to scrub them clean. Once that’s done, rinse them thoroughly.
Storage Tips for Longevity
Proper storage is just as important as cleaning. Keep your drill bits in a designated holder or case to protect them from damage and contamination. This not only helps in keeping them organized but also ensures they don’t come into contact with any harmful substances.
Signs It’s Time to Replace Your Bits
Even with the best care, nail drill bits don’t last forever. If you notice your bits becoming dull, taking longer to do their job, or causing discomfort during use, it’s time for a replacement. Typically, tungsten bits last longer, but ceramic bits might need changing more frequently. Always assess the condition of your bits regularly to maintain efficiency and safety.
Remember, maintaining your nail drill bits is not just about prolonging their life but also about ensuring a safe and hygienic experience for your clients. Regular cleaning and proper storage go a long way in keeping your tools in optimal condition.
Safety Considerations When Using Nail Drill Bits
Avoiding Common Mistakes
When working with nail drill bits, it’s easy to make a few missteps. One of the most frequent errors is using the wrong type of bit for the task at hand. For example, a bit designed for acrylic nails might be too harsh for natural nails. Always match the bit to the material you’re working with to avoid damage. Additionally, over-filing can lead to heat buildup, which might harm the nail bed. Keep the drill moving and use light pressure to prevent this.
Protecting Your Client’s Nails
Your client’s nails are your canvas, and keeping them healthy is key. Start with a clean slate by ensuring your bits are properly sanitized. Regular cleaning not only protects your clients but also extends the life of your bits. Use a soft brush to remove debris after each use and disinfect with a suitable solution. Remember, diamond nail drill bits are especially great for delicate nail work, providing precision and safety.
Using the Right Tools for Safety
Selecting the right tools is half the battle. If you’re working with gel or acrylic, consider using Lena Bits Corporation’s carbide nail drill bits for their durability and precision. They help in reaching those tricky spots without compromising safety. Also, ensure your drill is set to the correct speed. Starting slow and gradually increasing speed allows for better control and reduces the risk of slipping or over-filing.
Safety isn’t just about the tools you use; it’s about how you use them. Approach each task with care, and you’ll not only protect your clients’ nails but also enhance your skills.
Finding the Right Nail Drill Bits for Your Style

Assessing Your Nail Care Needs
Before diving into the world of nail drill bits, take a moment to think about your nail care needs. Are you someone who loves experimenting with intricate nail designs, or do you prefer a simple, polished look? Understanding your personal style and needs can help you make better choices. For those who enjoy working with acrylic or gel nails, selecting bits that cater to these materials is crucial.
Experimenting with Different Bits
Trying out different nail drill bits can be a fun way to discover what works best for you. Start with a basic set and gradually add specialized bits as you become more comfortable. Here’s a simple approach to get started:
- Begin with a basic set of bits that includes various shapes and grits.
- Try each bit on practice nails to see how they perform.
- Note which bits feel comfortable and efficient for your preferred nail styles.
Building Your Ideal Nail Drill Bit Collection
Once you’ve experimented with different bits, it’s time to build your ideal collection. Focus on quality over quantity. Investing in high-quality bits, like those from Lena Bits Corporation, ensures durability and precision. Consider including a mix of bits for different tasks, such as smoothing, shaping, and detailing. Remember, the right tools can make all the difference in achieving a professional finish.
Building a collection of nail drill bits tailored to your style is like assembling a wardrobe—each piece should serve a purpose and complement your unique approach to nail care.
Choosing the perfect nail drill bits can really change your nail game! Whether you want to create stunning designs or just keep your nails looking neat, the right bits make all the difference. Visit our website to explore a wide range of nail drill bits that suit your style and needs!
Wrapping It Up
So, there you have it! Picking the right nail drill bit isn’t rocket science, but it does take a bit of thought. Whether you’re a pro at the salon or just doing your nails at home, the right bit can make all the difference. Remember, it’s all about what you need—be it precision, speed, or versatility. Don’t be afraid to try different types and see what works best for you. And hey, if you mess up a bit, no worries, it’s all part of the learning curve. Happy drilling!
Frequently Asked Questions
What are nail drill bits used for?
Nail drill bits are tools used with electric nail drills to shape, smooth, and remove nail polish, helping with various nail care tasks.
How do I choose the right nail drill bit material?
Choose based on your needs: tungsten carbide for precision, ceramic for heat dissipation, and diamond for durability.
What’s the difference between individual bits and sets?
Individual bits let you pick exactly what you need, while sets offer a variety of bits for different tasks, often at a better price.
Why are there different shapes of nail drill bits?
Different shapes, like barrels or cones, are designed for specific tasks such as surface work or precision in tight areas.
How does grit level affect nail drill bits?
Grit levels determine how coarse or fine the bit is, affecting how much material it removes. Finer grits are gentler, while coarse grits remove more.
Can I use any nail drill bit with my drill?
Make sure your drill is compatible with the bit size, usually 3/32-inch, to ensure it fits and works correctly.
How should I clean my nail drill bits?
After each use, clean them with soap and water, disinfect with alcohol, and store them properly to keep them in good condition.
When should I replace my nail drill bits?
Replace them when they become dull or less effective, typically every few months, depending on usage.