Nail drill bits can be a real game-changer for your nail care routine, but if you’re not careful, they can also lead to some pretty common mistakes. Whether you’re a pro or just starting out, knowing how to avoid these slip-ups is key to keeping your nails healthy and looking great. In this article, we’ll break down the most frequent blunders people make with nail drill bits and how you can steer clear of them.
Key Takeaways
- Always match the speed setting to the task—low for delicate work, high for tough jobs.
- Choose the right bit for the job to prevent damage to your nails.
- Don’t press too hard; let the drill do the work to avoid injury.
- Keep your drill bits clean to prevent infections.
- Use protective gear like masks and glasses to stay safe.
Understanding The Risks Of Nail Drill Bits

Potential Skin Abrasions
Using nail drill bits can be tricky, especially if you’re new to it. One common mistake is using too much pressure, which can lead to skin abrasions. The high speed and friction can easily cause burns or cuts if you’re not careful. So, always keep a light touch.
Nail Damage Concerns
Another risk is damaging the nails themselves. Over-filing or using the wrong bit can thin out your natural nails, leaving them weak and prone to breaking. It’s crucial to choose the right bit for the task, like a fine grit barrel-shaped bit for smoothing and finishing.
Infection Risks
Infections are another concern, especially if your drill bits aren’t cleaned properly. Bacteria and fungi love to hide in the tiny crevices of these tools. To avoid this, make sure you’re cleaning your bits after every use and doing a deep clean weekly.
Remember, a little bit of caution can go a long way in keeping your nails healthy and beautiful.
Choosing The Right Speed For Nail Drill Bits
Low Speed For Delicate Tasks
When you’re working on sensitive areas like the cuticles or natural nails, it’s best to keep the speed low. Low speeds are perfect for these gentle tasks because they reduce the risk of damaging the nail or skin. Imagine you’re trimming a bonsai tree—slow and steady wins the race. At this speed, you have more control, which is crucial when you’re just starting out or dealing with delicate nails.
Medium Speed For General Maintenance
Medium speed is your go-to for everyday nail care. This setting is ideal for shaping and maintaining nails without the risk of overdoing it. It’s like cruising down a highway—not too fast, not too slow. You can handle most tasks comfortably, and it’s a great middle ground if you’re unsure about which speed to choose. Just remember, balance is key.
High Speed For Bulk Removal
High speed comes into play when you need to remove a lot of material quickly, like when you’re dealing with acrylic or gel nails. This setting is like turning up the heat on a stovetop to boil water—efficient but needs caution. Make sure you’re confident in your handling, as high speeds can easily lead to overheating or damage if not used properly. Always prioritize safety over speed, and take breaks if your drill or bit starts to get too hot.
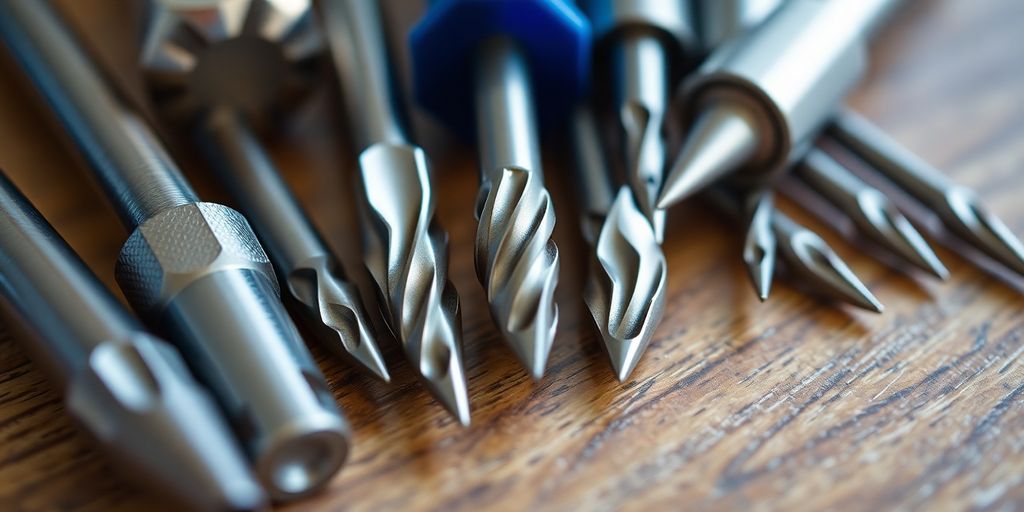
Selecting The Appropriate Nail Drill Bits
Tapered Bits For Cuticle Work
When it comes to handling cuticles, tapered bits are your go-to. These bits are designed to reach those tricky spots around the nail without damaging the skin. Using the right bit here can make all the difference in achieving a clean finish. Tapered bits help in gently pushing back cuticles and cleaning up any dead skin without causing abrasions.
Coarse Grit For Acrylic Removal
If you’re dealing with acrylic nails, coarse grit bits are essential. They are perfect for removing the bulk of acrylic material quickly and efficiently. It’s important to remember that these bits should be used with care to avoid damaging the natural nail underneath. A steady hand and controlled movements will ensure that you only take off what you need.
Fine Grit For Finishing Touches
Once you’ve done the heavy lifting, it’s time for the fine grit bits. These are used for smoothing out any rough edges and giving the nail a polished look. Fine grit bits are gentle enough to use on natural nails, providing that final touch that makes nails look professionally done.
Selecting the right drill bits can transform your nail care routine. It’s not just about the tool, but how you use it that counts. Whether you’re a pro or just starting out, choosing the right bit for each task will help you achieve the best results. Explore a variety of nail drill bits to find what fits your needs best.
Maintaining Nail Drill Bits For Longevity

Keeping your nail drill bits in top shape is key to achieving great results and extending their lifespan. Let’s break down some essential maintenance tips.
Cleaning After Each Use
After every manicure or pedicure session, make it a habit to clean your nail drill bits. Dust and debris can build up quickly, affecting performance and hygiene. Use a small brush to remove any residue, then rinse the bits in soapy water. For a deeper clean, consider soaking them in isopropyl alcohol for a few minutes. But remember, avoid soaking the handpiece in any liquid to prevent damage.
Weekly Deep Cleaning
Once a week, dedicate some time for a more thorough cleaning. Soak your bits in a disinfectant solution to ensure all bacteria and fungi are eliminated. This step is crucial for maintaining a sanitary workspace. If you have a UV light sanitizer box, it can be an excellent tool to add to your routine. Just a few minutes under the UV light can further ensure cleanliness.
Proper Storage Techniques
Storing your drill bits correctly is just as important as cleaning them. Keep them in a dry, organized place to avoid rust and contamination. Consider using a storage bag or a dedicated box with compartments for each bit. This not only keeps them safe but also makes it easier to find the right bit when you need it.
Taking care of your nail drill bits doesn’t just prolong their life—it also ensures your nail care routine is safe and effective. A little effort in maintenance goes a long way in achieving professional results at home.
Mastering Proper Technique With Nail Drill Bits
Gentle Pressure Is Key
When you’re using a nail drill, it might be tempting to press down hard to get the job done quickly. But letting the bit do the work is the real trick. You want to apply just enough pressure to guide the drill, not force it. This gentle approach helps you avoid damaging your nails or causing discomfort. Think of it like using a paintbrush; the lighter the touch, the smoother the result.
Controlled Movements Matter
Keeping your movements controlled and steady is super important. Wild, jerky motions can lead to accidents or uneven nails. Try to move the drill in a consistent, smooth manner. Imagine you’re drawing a straight line with a pencil; you want to keep it as straight as possible. This not only gives you better results but also keeps your nails healthier.
Avoiding Prolonged Use
It’s easy to get caught up in the process and lose track of time, but overusing a nail drill can lead to overheating. Taking breaks is crucial. Give the bit a chance to cool down and your hand a rest. This practice not only extends the life of your drill bits but also keeps your nails safe from heat damage. Remember, a little patience goes a long way in nail care.
Handling Your Nail Drill Safely
Firm Grip For Control
When you’re using a nail drill, it’s super important to hold it with a firm grip. This isn’t just for control, but it also helps prevent any slips that could lead to accidents. Imagine you’re holding a pen; you want it snug but not too tight. Keeping a firm grip ensures that the drill does what you want it to do, not the other way around. If you’re new to this, practice holding the drill off first before you actually start using it on your nails.
Keeping A Steady Hand
A steady hand is your best friend when working with a nail drill. It’s easy to get shaky, especially if you’re nervous or just starting out. Try to relax your hand and arm, and if possible, rest your elbow on a table or armrest for additional stability. This simple trick can make a world of difference. Precision is key, and a steady hand helps you achieve that.
Using An Anchor Point
An anchor point is something you can use to stabilize your hand while working. This could be your pinky finger resting against your other hand or the table. By anchoring your hand, you reduce the vibration and increase your control over the drill. It’s a small adjustment that can help prevent mishaps and make your nail care routine much smoother.
Wearing Protective Equipment During Use
Safety Glasses For Eye Protection
When you’re working with nail drills, tiny particles can fly around. Safety glasses are a must to keep your eyes safe from nail dust and debris. It’s like having a shield for your eyes. Some glasses even come with side shields for extra protection. You don’t want to end up with something in your eye just because you skipped the glasses.
Dust Masks For Lung Safety
Nail dust isn’t just messy; it can be harmful if you breathe it in. Wearing a dust mask helps keep your lungs safe from all that stuff floating in the air. Choose a mask that fits well and has good filtration. It’s a simple step that makes a big difference in keeping your lungs healthy.
Nitrile Gloves For Hygiene
Gloves might seem like overkill, but they really help keep things clean. Nitrile gloves are great because they’re tough and keep chemicals off your skin. Plus, they help prevent cross-contamination. It’s like adding an extra layer of hygiene to your nail care routine.
Remember, using the right protective gear isn’t just about safety—it’s about making sure your nail care experience is as smooth and worry-free as possible. So, gear up and keep those nails looking fabulous without any hassle.
Educating Yourself On Nail Drill Usage
Reading The Manual
When you get a new nail drill, the first thing to do is crack open that manual. It’s not just a paperweight or something to toss aside. Manuals are packed with all the nitty-gritty details about your drill. Knowing your tool inside out can save you from a lot of headaches. You’ll find info on speed settings, maintenance tips, and even troubleshooting advice. If you skip this step, you might miss out on some cool features or, worse, misuse the drill.
Exploring Online Tutorials
The internet is a treasure trove of information, especially when it comes to nail drills. There are countless video tutorials and articles that can walk you through the basics and even some advanced techniques. Online resources can be super helpful if you’re a visual learner or if reading manuals isn’t your thing. These tutorials can show you how to hold the drill, adjust the speed, and even how to clean the bits properly.
Seeking Professional Guidance
If you’re still feeling unsure, reaching out to a pro can be a game changer. Professional nail technicians have tons of experience and can offer tips you won’t find in any book or video. Consider taking a class or workshop where you can get hands-on practice and immediate feedback. And don’t hesitate to ask questions—pros love sharing their knowledge. Plus, places like Lena Bits Corporation offer training for nail professionals, which can be a great way to learn from the best.
Avoiding Common Mistakes With Nail Drill Bits
Applying Too Much Pressure
When using a nail drill, it’s easy to think that more pressure equals better results. But that’s not the case. A gentle touch is all you need. Let the drill bit do its job. Pushing too hard can lead to pain or even damage your nails. Think of it like sanding wood—too much force can ruin the surface rather than smooth it.
Using Incorrect Speed Settings
Speed matters a lot when working with nail drills. Start slow, especially if you’re new to this. For delicate tasks like shaping natural nails, a low speed is ideal. As you get more comfortable, you can crank it up for tougher jobs like removing acrylics. But don’t rush it. Using the wrong speed can lead to slips or worse, nail damage.
Neglecting To Clean Equipment
Keeping your tools clean isn’t just about hygiene—it’s about performance too. After each use, make sure to clean your drill bits. Dust and debris can build up, affecting how well your drill works. Plus, unclean tools can spread bacteria, which nobody wants. Regular cleaning helps your equipment last longer and keeps your nails looking their best.
Mistakes happen, but with a bit of care, you can avoid the common pitfalls of using nail drills. Remember, it’s about finesse, not force. Keep your tools in top shape, and your nails will thank you.
Recognizing Signs Of Overheating
Taking Breaks To Cool Down
It’s easy to get caught up in the task at hand, but remember, your nail drill needs a breather just like you do. Regular breaks are essential to prevent overheating. When you’re filing, especially for extended periods, make it a habit to pause and let both the drill bit and your nails cool down. This simple step can save you from a lot of discomfort and potential damage.
Checking Bit Temperature
A quick touch test can help you keep tabs on the temperature of your drill bit. If it feels hot to the touch, it’s definitely time to take a break. Overheating can not only harm your nails but also reduce the lifespan of your drill bit. So, make it a point to check the temperature regularly during use.
Avoiding Over-Filing
One of the common mistakes is staying in one spot for too long. This can cause friction, leading to excessive heat buildup. To avoid this, keep the drill bit moving in a gentle, circular motion. This technique not only prevents overheating but also ensures a more even and smooth finish on your nails.
Keeping your drill bits in top shape is a game-changer for your nail care routine. With the right practices, you can enjoy a seamless and safe experience every time you use your nail drill. Remember, it’s all about balance—between efficiency and care.
Creating A Safe Workspace For Nail Care

When it comes to nail care, setting up a safe and organized workspace is just as important as mastering your technique. A tidy and well-equipped area not only enhances your efficiency but also minimizes risks and accidents. Let’s dive into some practical steps to create a safe and comfortable environment for your nail care routine.
Keeping The Area Tidy
A clutter-free workspace is a productive one. Start by organizing your tools and supplies. Use containers or trays to keep everything in its place, making it easier to find what you need without unnecessary distractions. Regularly clean your work surface to remove dust and nail clippings. This ensures a hygienic environment that reduces the risk of cross-contamination.
Using A Dust Collector
Nail dust is an inevitable part of the process, but it can be managed effectively. Investing in a dust collector can be a game-changer. These devices help capture and contain dust particles, keeping your breathing space clear and preventing the spread of debris. It’s especially useful if you’re working with acrylics or gels that produce more dust.
Ensuring Proper Ventilation
Proper air circulation is crucial in a nail care setting. Good ventilation helps disperse any fumes from nail products, ensuring a healthier environment for you and your clients. Consider setting up your workspace near a window or using a fan to encourage airflow. If possible, a small air purifier can also aid in maintaining air quality, filtering out fine particles and odors.
Taking the time to create a safe and organized workspace can transform your nail care experience. It’s not just about aesthetics; it’s about creating an environment where you can focus on your craft without worrying about safety hazards. Remember, a little effort goes a long way in ensuring both your safety and the quality of your work.
To ensure a safe and clean space for nail care, it’s important to keep your area organized and free from clutter. Make sure to use proper tools and disinfect them regularly. This not only protects you but also your clients. For more tips and products to enhance your nail care experience, visit our website!
Wrapping It Up
Alright, so there you have it! Using nail drill bits doesn’t have to be a daunting task if you keep a few things in mind. Remember to choose the right bit for the job, keep your speed in check, and always handle the drill with care. It’s all about practice and patience. Don’t rush it, and definitely don’t skip on cleaning those bits after you’re done. With these tips, you’ll be on your way to mastering your nail game without any hiccups. So go ahead, give it a whirl, and enjoy those fabulous nails!
Frequently Asked Questions
What are the risks of using nail drill bits?
Nail drill bits can cause skin scrapes, nail damage, or infections if not used right. It’s important to handle them carefully and clean them properly.
How do I choose the right speed for my nail drill?
Use low speed for gentle tasks like cuticle care, medium speed for regular shaping, and high speed for removing thick material like acrylics.
Which nail drill bit should I use for cuticle work?
Tapered bits are best for cuticle work because they allow you to work precisely without hurting the skin.
How often should I clean my nail drill bits?
Clean your nail drill bits after every use to remove debris and do a deeper clean every week to keep them in top shape.
What is the proper way to handle a nail drill?
Hold the drill firmly, keep a steady hand, and use an anchor point to control the drill while working on nails.
Why is it important to wear protective gear when using a nail drill?
Wearing safety glasses, dust masks, and gloves can protect your eyes, lungs, and skin from dust and debris.
How can I avoid common mistakes with nail drills?
Avoid using too much pressure, choose the right speed setting, and always clean your equipment after use.
What should I do if the nail drill bit gets too hot?
Take breaks to let it cool down, check the bit’s temperature regularly, and avoid filing the same spot for too long.