Ever wondered how nail salons get those perfect finishes? Well, one of their secrets is the nail drill bit. If you’re thinking of trying it at home, it’s not as scary as it sounds. With a little know-how and some practice, you can achieve salon-like results right in your living room. This guide will walk you through the basics of using nail drill bits safely and effectively.
Key Takeaways
- Nail drill bits come in various types and materials, each suited for different tasks.
- Safety first: Always sanitize your tools and understand the drill’s direction for best results.
- Start slow, especially if you’re new, to avoid damaging your nails with too much pressure.
- Keep your workspace clean and well-lit to make the process easier and safer.
- Regular maintenance of your drill bits ensures they last longer and work better.
Understanding Nail Drill Bits and Their Functions
What Are Nail Drill Bits?
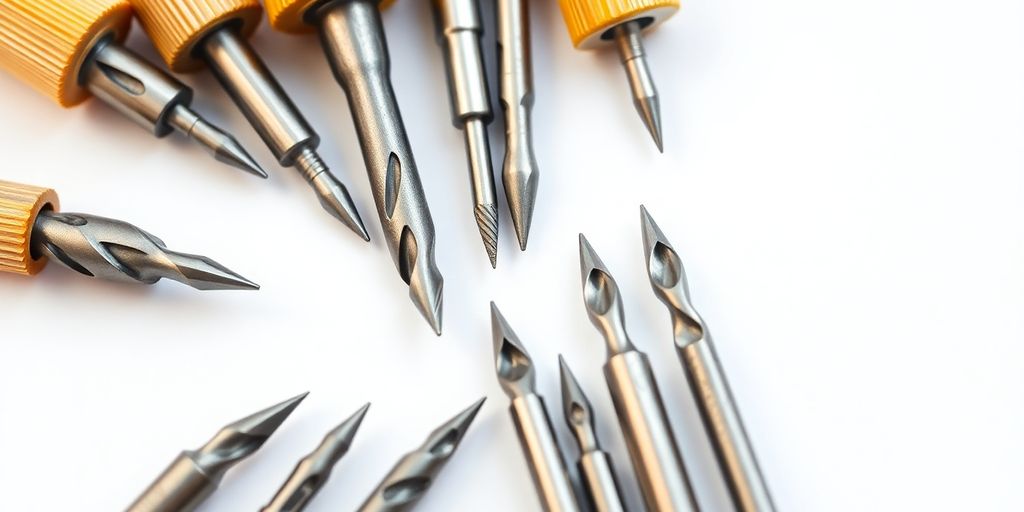
Nail drill bits are small, interchangeable tools designed for use with electric nail drills, often called e-files. These bits are essential for both professional nail technicians and at-home enthusiasts. They help in shaping, smoothing, and cleaning nails, making them versatile tools for manicures and pedicures. Imagine them as the Swiss army knife of nail care! With the right bit, you can tackle everything from removing gel polish to refining acrylic extensions.
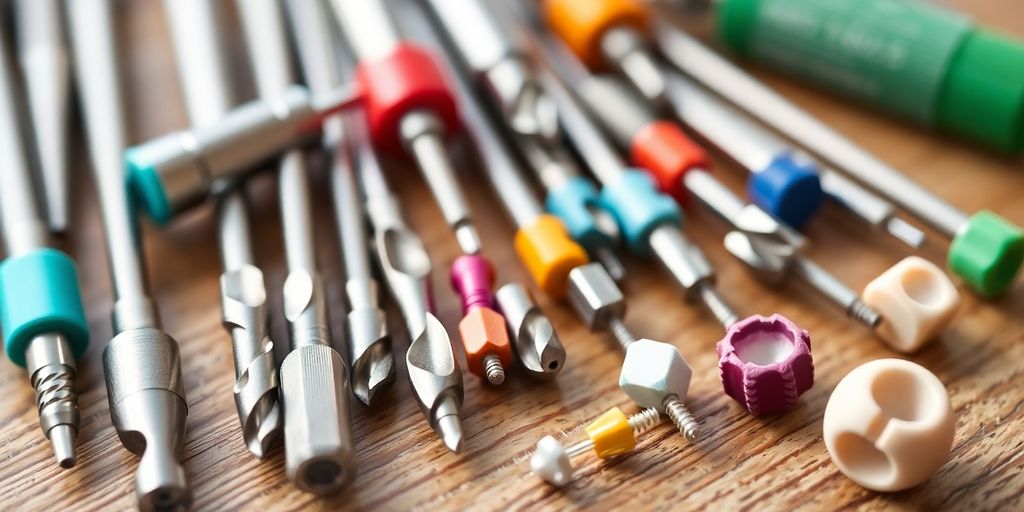
Different Types of Nail Drill Bits
Nail drill bits come in various shapes and materials, each serving a unique purpose:
- Carbide Bits: Made from tungsten carbide, these are super durable and great for removing tough materials like acrylic or gel polish quickly. They have cuts or grooves along the surface, which help in efficient material removal without generating excessive heat. Explore a variety of high-quality carbide nail drill bits designed for manicures and pedicures.
- Diamond Bits: Coated with diamond particles, these bits are ideal for smoothing and shaping. They are great for cuticle work and refining the nail bed.
- Ceramic Bits: Known for staying cooler than carbide, ceramic bits are perfect for prolonged use and are available in various grit levels. They are ideal for both natural nails and enhancements.
- Silicone Bits: Softer and less abrasive, these are designed for natural nails or buffing the surface, making them perfect for gentle work on delicate areas like cuticles.
Choosing the Right Nail Drill Bit
Selecting the right nail drill bit depends on the task at hand. Here are some tips to help you choose:
- Identify Your Needs: Are you working with natural nails, acrylics, or gel polish? Different materials require different bits.
- Consider the Material: Choose carbide for durability, diamond for precision, or ceramic for cooler operation.
- Shape Matters: The shape of the bit can affect its function. Tapered bits are great for reaching tight spots, while round bits are good for smoothing.
Picking the right drill bit isn’t just about the task—it’s about making your nail care routine more efficient and enjoyable. With the right tools, you can achieve salon-quality results at home.
Essential Safety Precautions for Nail Drilling
When you’re diving into the world of nail drilling, safety should be your top priority. Let’s chat about how you can keep things safe and sound while getting those nails on point.
Sanitation and Hygiene Practices
Before you even think about plugging in that nail drill, cleanliness is key. Keeping your tools clean helps prevent infections and keeps your nails healthy. Make sure to disinfect your nail drill and all attachments after each use. You can use methods like autoclaving or chemical sterilants for reusable drill bits. And hey, if you can, go for disposable bits to cut down on contamination risks.
Understanding Drill Direction
The direction your drill spins can make a big difference in how your nails turn out. Most drills let you choose between clockwise and counterclockwise. Clockwise is usually best for right-handed folks working on their right hand, while counterclockwise suits lefties. Get to know your drill’s settings and adjust as needed for the best results.
Proper Handling Techniques
Handling your nail drill correctly is super important. You want to hold the handpiece firmly but comfortably. A relaxed grip helps reduce hand fatigue during longer sessions. Keep your wrist supported and maintain a stable grip for better control. This way, you can avoid any slips or mishaps while you work on your nails.
Remember, taking the time to practice these safety steps can make all the difference in your nail drilling experience. It’s all about keeping things safe and achieving those fabulous nails without a hitch.
Preparing Your Workspace for Nail Drilling
Creating a Clean Environment
Before you jump into nail drilling, it’s super important to set up a clean space. Keeping your area tidy helps avoid infections and keeps things organized. Start by wiping down your table or desk with a disinfectant. Make sure you’re working in a place that’s free from distractions and clutter. It’s a good idea to have a trash can nearby for easy disposal of nail dust and debris.
Gathering Necessary Tools
Next, gather all the tools you’ll need. Here’s a handy list:
- Nail drill and drill bits
- Hand towel or mat
- Dust brush
- Safety goggles
- Mask (to avoid inhaling dust)
Having everything within reach saves you time and keeps the process smooth. If you’re missing something, it’s best to get it before you start.
Ensuring Adequate Lighting
Good lighting is key when working on nails. You want to see exactly what you’re doing to avoid any mishaps. A desk lamp with an adjustable arm can be super helpful. Natural light is great, but if that’s not an option, a bright LED lamp will do the trick. Proper lighting not only helps with precision but also reduces eye strain during detailed work.
Setting up your workspace might seem like a hassle, but trust me, it makes the whole nail drilling experience way better. You’ll thank yourself later when everything’s in place and you’re not scrambling to find tools mid-process.
Basic Techniques for Using Nail Drill Bits
Preparing Nails Before Drilling
Before you even think about turning on that drill, make sure your nails are ready for action. Start by removing any old polish with a gentle remover. Trim your nails to your desired length and then push back the cuticles with a cuticle pusher or orangewood stick. It’s super important to work on clean, dry nails to avoid any infections and to get a nice, smooth finish.
Using a Drill for Cuticle Removal
Using a nail drill for cuticle removal might sound tricky, but with a bit of practice, it becomes second nature. Choose a fine or medium-grit bit—something gentle to avoid damaging the nail plate. Hold the drill like a pencil and gently guide it around the cuticle area. Let the drill do the work; don’t press too hard. Remember, you want to be gentle to keep your nails healthy.
Filing Techniques with a Nail Drill
When it comes to filing, a nail drill can be your best friend. Whether you’re shaping or smoothing, the right technique makes all the difference. Start with a lower speed setting and gradually increase as you get more comfortable. Use a side-to-side motion and keep the drill moving to avoid heat buildup. This helps in achieving a smooth finish without damaging the nails. For beginners, a fine-grit sanding band is a good choice to start with.
Using a nail drill effectively is all about practice and patience. Whether you’re refining the shape of your nails or just doing some basic maintenance, take your time to learn the ropes. With each session, you’ll get better and more confident.
If you’re looking to buy nail drill bits, consider the variety of options available from Lena Bits Corporation, which offers everything from diamond bits for smoothing to carbide bits for durability. Their selection caters to both beginners and pros, ensuring you find just the right tool for your nail care needs.
Tips for Effective Nail Drilling
Starting Slow and Steady
When you’re just getting the hang of using a nail drill, it’s a smart move to start slow. Begin with the lowest speed setting. This gives you a feel for the drill and helps prevent any accidental slips. As you get more comfortable, you can gradually increase the speed. Think of it like learning to drive; you wouldn’t floor it on your first day behind the wheel, right?
Avoiding Heat Buildup
One of the things you want to watch out for is heat buildup. If you’ve ever felt that uncomfortable warmth while drilling, you know what I’m talking about. To avoid this, take frequent breaks. Let the drill bit and your nails cool down. If it gets too hot, just stop and give it a rest. It’s better to take your time than to risk damaging your nails.
Maintaining Control and Precision
Keeping a steady hand is key. Hold the drill like a pencil, with a relaxed grip. This helps you maintain control and precision. Also, make sure you’re sitting comfortably and your wrist is supported. A stable grip means you can explore a range of high-quality diamond nail drill bits with confidence, ensuring smooth and even results.
Remember, patience is your best friend when you’re learning to use a nail drill. Take your time, and don’t rush the process. It’s all about getting the technique right and keeping your nails healthy.
Common Mistakes to Avoid with Nail Drill Bits
Over-Pressuring the Drill
One of the biggest mistakes beginners make is using too much pressure when working with a nail drill. It’s easy to think that more pressure equals faster results, but that’s a recipe for disaster. Instead, let the drill do the work. Apply light pressure and guide the drill bit smoothly across the nail. This not only prevents damage to the nail but also keeps the drill bit from wearing out too quickly. Remember, patience is key.
Neglecting Safety Gear
Skipping safety gear is another common oversight. Safety glasses and masks might seem unnecessary, but they protect you from dust and debris. Tiny particles can easily irritate your eyes and lungs, so it’s always better to be safe than sorry. It’s a simple step that can save you a lot of trouble later on.
Ignoring Nail Health
While focusing on technique, don’t forget about the health of your nails. Overuse of a drill can lead to thinning and weakening of the nail bed. Keep an eye out for signs of damage like redness or pain. If you notice anything unusual, give your nails a break. Regularly moisturizing with cuticle oil can also help maintain nail health.
Taking care of your nails is just as important as perfecting your technique. Healthy nails are the foundation for any great manicure.
By avoiding these common pitfalls, you can ensure a safer and more effective nail drilling experience. And if you’re looking for high-quality drill bits, Lena Bits Corporation offers a variety of options designed to enhance precision and safety in your nail care routine.
Maintaining Your Nail Drill Bits
Cleaning and Sanitizing Drill Bits
Keeping your nail drill bits clean is a must for both hygiene and their longevity. After each use, make sure to clean your bits thoroughly. Use a small brush to sweep away any debris or nail dust. For metal bits like carbide or diamond, an ultrasonic cleaner can be super handy to get rid of the tiny particles. After brushing, soak them in a disinfectant solution, then rinse and let them dry completely. This helps in preventing any contamination and keeps your bits ready for the next use.
Storing Nail Drill Bits Properly
Proper storage is key to maintaining the quality of your nail drill bits. Always store them in a clean, dry, and covered container. This prevents exposure to dust and moisture, which can damage the bits over time. Some folks like using a bit holder or a small case that keeps each bit separate and safe from knocking into each other. It’s a simple step, but it makes a big difference in keeping your tools in tip-top shape.
Recognizing When to Replace Bits
Even the best nail drill bits won’t last forever. It’s important to know when it’s time to swap them out for new ones. If you notice a bit is not cutting as efficiently or has visible wear, it’s time for a replacement. Continuing to use worn bits can lead to poor performance and might even damage your nails. Regularly inspecting your bits for signs of wear can save you trouble and keep your nail care routine smooth and effective.
It’s easy to overlook the small details, but maintaining your nail drill bits is just as important as any other part of your nail care routine. A little care goes a long way in ensuring your tools last and perform well.
For those looking to explore a range of high-quality options, Lena Bits Corporation offers a selection of durable and precise nail drill bits, perfect for both manicure and pedicure treatments. Their products emphasize safety and maintenance, making them a great choice for anyone serious about nail care.
Exploring Different Nail Drill Bit Materials
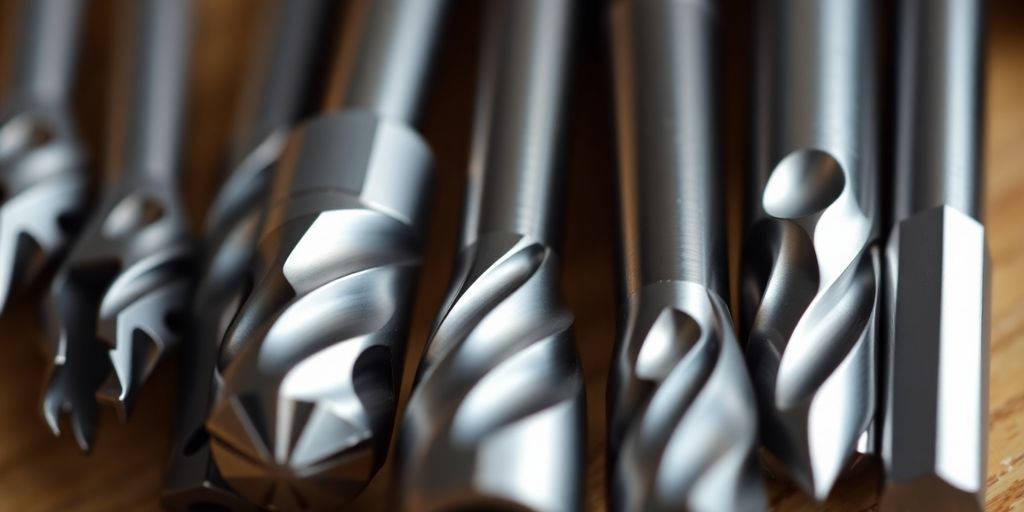
Carbide Bits for Durability
Carbide bits are like the workhorses of nail drilling. They’re super tough and can handle removing hard materials like acrylics and gel polish with ease. These bits often have grooves or cuts that help them shave down material quickly without causing too much heat. If you’re dealing with thick layers, these are your go-to. Carbide bits are built to last, making them a favorite for those who frequently do their nails.
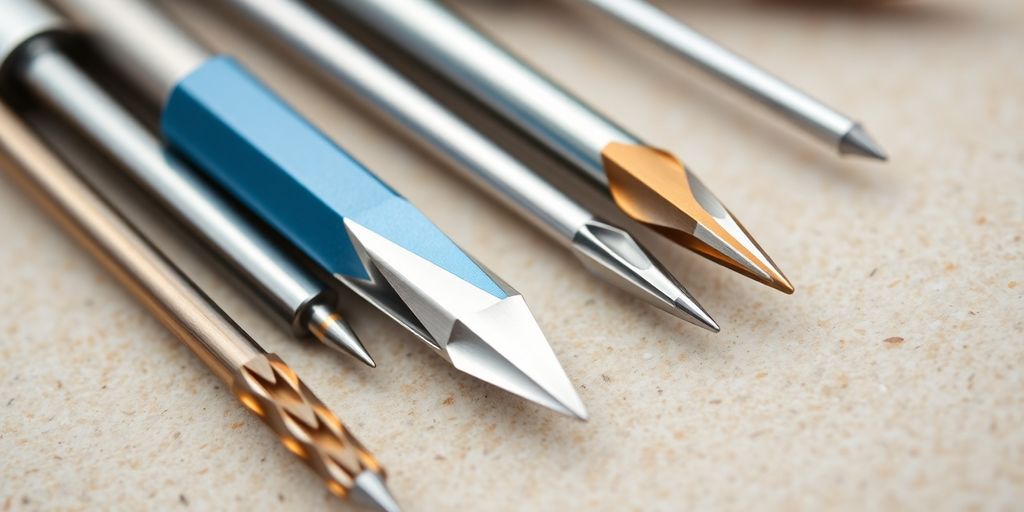
Diamond Bits for Precision
When you need something precise, diamond bits are the way to go. These bits are covered in tiny diamond particles, which makes them perfect for smoothing and shaping. They’re great for delicate work like cuticle care or refining the nail bed. If you’re looking to finish off a manicure with a polished look, diamond bits are ideal. Check out a range of high-quality diamond nail drill bits designed for both manicure and pedicure applications.
Ceramic Bits for Gentle Use
Ceramic bits are known for staying cooler during use, which is a big plus if you’re working on natural nails or need to avoid heat buildup. They come in various grit levels, so you can choose how fine or coarse you want the bit to be. These are fantastic for both beginners and those who need a bit that’s gentle yet effective. Whether you’re shaping or smoothing, ceramic bits do the job without being too harsh.
Understanding Nail Health and Care
Signs of Healthy Nails
Healthy nails are more than just a cosmetic feature; they’re a reflection of your overall health. Strong and smooth nails with a slight pinkish hue indicate good nail health. Look for nails that are free from spots, discoloration, or ridges. If your nails are brittle or frequently split, it might be time to rethink your nail care routine.
Common Nail Issues to Watch For
Sometimes, nails can signal underlying health problems. Watch out for:
- Yellowing: Could indicate fungal infections or other health issues.
- White spots: Often a sign of nail trauma or zinc deficiency.
- Peeling: Might be due to dryness or overuse of harsh nail products.
If you notice persistent changes, it’s wise to consult a healthcare professional.
How Nail Drilling Affects Nail Health
Using a nail drill can be a game-changer for manicures, but it’s essential to use it correctly. Over-drilling can lead to thinning, weakening, or even peeling of your nails. To avoid these issues:
- Start with a low-speed setting.
- Use gentle pressure and let the drill do the work.
- Take breaks to prevent heat buildup.
Remember, balance is key. Nail drills are fantastic tools, but like any tool, they require a careful and informed approach to maintain nail health.
For those seeking professional-grade tools, Explore a range of high-quality nail drill bits that are designed for both acrylic and natural nails, ensuring precision and safety.
Troubleshooting Common Nail Drill Issues
Dealing with Overheating
Overheating is a common hiccup when using nail drills, especially for beginners. If your drill feels hot, it’s time to take a break. Running it continuously can cause not just discomfort but also damage to your nails. Here’s a quick checklist to keep things cool:
- Speed Settings: Start with a lower speed and gradually increase as needed.
- Pressure: Lighten up! Too much pressure can cause friction and heat.
- Breaks: Give your drill a rest every few minutes.
Remember, a little patience goes a long way in preventing overheating.
Addressing Uneven Filing
Uneven filing can leave your nails looking lopsided or rough. To get that smooth, even finish, make sure you’re holding the drill at a consistent angle. Here are some tips:
- Hold the drill steady and keep it moving across the nail surface.
- Use a fine-grit bit for finishing touches.
- Practice on a nail tip before working on your own nails.
Fixing Drill Bit Jams
Drill bit jams can be frustrating, but they’re usually easy to fix. First, check if the bit is inserted correctly. If it’s not, it might not spin properly. Here’s what you can do:
- Check Alignment: Ensure the bit is secure and aligned.
- Clean Regularly: Dust and debris can cause jams, so keep your bits clean.
- Inspect for Damage: Sometimes, a worn-out bit is the culprit.
With a bit of care and attention, you can keep your nail drill running smoothly and avoid these common pitfalls. For more advanced tools, check out Lena Bits Corporation’s range of nail drill bits that are perfect for both beginners and pros alike.
Advanced Techniques for Experienced Users
Refining Nail Shapes
Once you’ve got the hang of using a nail drill, it’s time to step up your game. Refining nail shapes is all about precision and creativity. Whether you’re working on almond, stiletto, or coffin shapes, the right technique can make all the difference. Start by selecting a drill bit that matches the shape you’re aiming for. This will help you achieve smooth edges and a uniform finish. Remember, practice makes perfect, so don’t rush the process. Take your time to ensure each nail is shaped just right.
Creating Nail Art with Drill Bits
Nail art isn’t just about brushes and polish anymore. With the right drill bits, you can create intricate designs that stand out. Carbide nail drill bits, like those from Lena Bits Corporation, are ideal for detailed work. They offer durability and precision, allowing you to carve out unique patterns. Start with simple designs and gradually work your way up to more complex art. Keep your hand steady and use a light touch to avoid gouging the nail.
Using Drill Bits for Pedicures
Pedicures can benefit greatly from the use of nail drills, especially when dealing with tough calluses or thick toenails. Opt for a coarse drill bit to gently buff away hard skin. For cuticle work, a diamond nail drill bit is perfect for precision and safety. These bits help maintain neat and tidy nails, ensuring a salon-quality finish at home. Always sanitize your tools before and after use to keep things hygienic.
Mastering advanced techniques with nail drills not only enhances your skills but also opens up a world of creative possibilities. Keep experimenting and pushing your boundaries to discover what you can achieve.
Choosing the Right Nail Drill for Beginners
Key Features to Look For
When you’re just starting with nail drills, it can be a bit overwhelming to pick the right one. The key is to focus on a few essential features. First off, consider the power of the drill. For beginners, a drill with adjustable speed settings is crucial. You want something that lets you start slow and gradually increase the speed as you get more comfortable. Look for a drill that offers a range of speeds to match your growing skills.
Next, think about the handpiece. It should be lightweight and comfortable to hold for extended periods. You don’t want something that feels like a brick in your hand after a few minutes. Also, check if the drill has a good grip, so it doesn’t slip while you’re working on your nails.
Lastly, consider the versatility of the drill. A good beginner drill should work with various drill bits, like those offered by Lena Bits Corporation. This way, you can experiment with different techniques and find what works best for you.
User Reviews and Recommendations
Before buying, it’s always a good idea to read user reviews. They can give you insights into how the drill performs in real-world situations. Look for reviews that mention ease of use, durability, and any issues with overheating or noise. Often, other beginners will share their experiences, which can be incredibly helpful.
Don’t hesitate to ask friends or family for recommendations. Sometimes, word of mouth can lead you to the perfect drill. You might even find someone willing to let you try theirs before you decide.
Budget-Friendly Options
You don’t have to break the bank to get a decent nail drill. There are plenty of budget-friendly options that offer great performance for beginners. Look for drills that offer a good balance between price and features. It’s important to remember that a higher price doesn’t always mean better quality.
Some affordable drills come with starter kits that include a variety of drill bits, which can be a great way to start experimenting with different nail techniques. Just make sure that whatever you choose, it aligns with your needs and comfort level. Starting with a simpler, less expensive model can be a smart move, allowing you to upgrade as your skills improve.
Remember, the best nail drill for you is one that fits your personal style and comfort level. There’s no rush—take your time to find a drill that you feel confident using.
If you’re just starting out with nail care, picking the right nail drill can be tricky. It’s important to choose a drill that is easy to use and fits your needs. Check out our website for helpful tips and a great selection of nail drills that are perfect for beginners!
Wrapping It Up
So there you have it, folks! Using nail drill bits doesn’t have to be intimidating. With a little practice and the right approach, you can achieve salon-quality nails right at home. Remember, start slow, keep things clean, and always prioritize safety. Don’t be afraid to experiment with different bits and techniques to find what works best for you. And hey, if you make a mistake, it’s all part of the learning process. Happy drilling, and may your nails always look fabulous!
Frequently Asked Questions
What exactly are nail drill bits used for?
Nail drill bits are tools used with electric nail drills to shape, file, and smooth nails. They help in removing gel polish, refining acrylics, and preparing nails for extensions.
How do I choose the right nail drill bit?
Choose a nail drill bit based on the material of the nails you are working on. For natural nails, use softer bits like ceramic or silicone. For acrylics, carbide bits are more suitable.
Is it safe for beginners to use nail drills?
Yes, beginners can use nail drills safely by starting with low speeds, using gentle pressure, and practicing on fake nails before working on their own.
How can I prevent overheating when using a nail drill?
To avoid overheating, keep the drill moving, use lower speeds, and take breaks to let the bit and nails cool down.
Why is it important to sanitize nail drill bits?
Sanitizing nail drill bits prevents the spread of germs and infections, ensuring a clean and safe nail care routine.
Can nail drilling damage my nails?
Improper use of a nail drill can damage nails. Always use the correct bit, speed, and technique to protect your nails.
What should I do if my nail drill bit gets stuck?
If a bit gets stuck, turn off the drill and gently wiggle the bit free. Avoid forcing it, as this can damage the drill.
How often should I replace my nail drill bits?
Replace your nail drill bits when they become dull or show signs of wear to maintain effective and safe nail care.